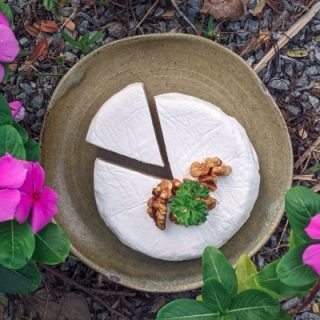
VEGAN BRIE CHEESE
This dairy-free, vegan brie cheese is perfect for cheese boards, sandwiches, salads, vegan pizzas, and so much more. If you were a cheese lover before, I am sure this is the thing you need in your life!
Cheese, who misses it? “Me!!!” is the answer you will get from many vegans around the world. “I will never give up cheese” is another answer we often hear from vegetarians and people eating a diet based on animal products. Why do we find it so hard to give up cheese?
Are We Addicted to Cheese? Should We Avoid Cheese?
We all seem to agree that cheese is delicious and we find it hard to give up pizza, pasta, gratins, grilled sandwiches, and other dishes where cheese plays a major role. It is the one thing stopping so many people from transitioning from an animal-based or vegetarian diet to a plant-based diet.
A 2015 study found that cheese triggers the same part of the brain as many drugs. A chemical called casein, which is found in dairy products, can trigger the brain’s opioid receptors. So is cheese addictive? The short answer is YES!
Each bite of cheese triggers a small release of dopamine in the brain. To be more specific, during the digestion of cheese, casomorphins – a compound very similar to opioids – are released and bind to the same receptors in our brain as heroin and other narcotics resulting in a little hit of dopamine. Some people have duped cheese to be the legal crack.

Apart from giving you a ninor crack-like hit, we also crave cheese because of its high fat content and the presence of tyramine and phenylethylamine. These chemicals are known to trigger feelings of happiness and love. Knowing all this you might better understand why so many people find it hard to live without cheese!
If you are one of the people who has given up dairy, congratulate yourself! You have successfully beat the cheese addiction!
Apart from being an addictive substance, dairy doesn’t have much to offer when it comes to nutrition and health. But I want to leave this conversation to another post as it would take me too long and I know you are eager to learn how to make vegan brie cheese, which is healthy and non-addictive.
However, before we dive into the wonderful world of vegan cheese-making and fermentation, I want to touch upon one other topic: Animal welfare!
Cows are super sensitive creatures that forge complex societies and friendships within their herd. Believe me. At some point, not too long ago, I was part of the herd. The previous house we rented was on a plot of 4 hectares which we shared with 7 free roaming cows. They are much like big dogs. When you come home they come to greet you and they can be very playful, curious, and affectionate.
Did you ever think about the life of the dairy cow behind that glass of milk or piece of cheese you like so much? The life of a dairy cow starts with separation from its mother, hours following from their birth. This brings great distress, sadness, and depression to both calf and mom. If the calf is female, it will likely be raised to face the same fate.
The calf will be vaccinated, dehorned, and have extra teats cut off. Then it will be fed replacement milk (usually full of hormones) until it is old enough to switch to fat-making grains. When the calf reaches 15 months she will be artificially intimated to start milk production and the circle is complete. In the coming years, her calves will be taken from her. While they both mourn, this cycle will repeat itself until she no longer produces milk. Then she will be slaughtered and sold for meat.
Male calves, on the other hand, are considered a ‘by-product’ that has no use in the cycle. They are often killed within hours/days after birth.

Servings
3 round cheeses
Ready In:
30 min
Aging Time:
4-6 weeks
Good For:
Cheese substitute
Introduction
About this Recipe
By: Amy Goodrich
With no health-damaging compounds such as casein, antibiotics, and growth hormones, vegan cheeses are a safe and healthy option.
Store-bought vegan cheeses, however, are often packed with soy, additives, preservatives, colorants, and not-so-kosher other ingredients. As I have said a million times before, carefully read food labels and steer clear from any products that have too many ingredients of which half or more of them you can’t even pronounce.

What’s the better solution to your health and cheese cravings? Give this vegan brie cheese recipe a try. Though you will need patience, a lot of patience, as the whole process will take a few weeks, hands-on time is actually very little.
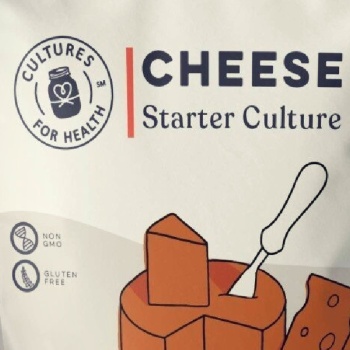
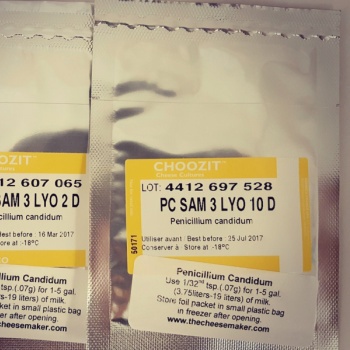
Plus, this cheese only has a few ingredients, being water, raw cashew nuts, salt, a mesophilic bacteria culture for fermentation and creation of the cheese flavor, and a Penicillium candidum fungi culture to produce the white rind.
Though you might not be able to pronounce the name of these cultures, they are 100% natural and good for you!
Ingredients
- 4 cups raw cashew nuts
- ½ cup filtered water
- ⅛ tsp Mesophilic cheese culture
- ⅛ tsp Penicillium candidum
- 2 tsp Himalayan pink salt or sea salt
FYI: You can also use a thermophilic cheese culture. What’s the difference? Mesophilic bacteria grow best at lower temperatures compared to thermophilic bacteria. Furthermore, mesophilic culture blends are used primarily for American-style and specialty cheeses – such as cheddar, brie, etc. – while thermophilic cultures are frequently used in Italian-style cheeses – such as parmesan, provolone, etc. While vegan brie cheese will never taste the same as real brie, using a mesophilic culture will come close to it. Though the thermophilic culture will also produce a delicious cheesy flavor. The penicillin fungi’s function is to create the white rind, which is so typical for brie cheese.
Meet the powerhouse rock stars of this dish


Nutrition
Aside from being super delicious, this vegan brie cheese is an excellent source of vitamin B6, iron, magnesium, calcium, healthy fats, protein, and fiber.
Unlike animal cheese, this brie cheese is good for you. It is packed with more essential vitamins and minerals than dairy cheese and will not increase cholesterol or the risk of heart disease and other life-threatening diseases.
- Dietary fiber 5%
- Carbs 5%
- Fat 27%
- Protein 15%
- Calories 13%

NOTE:
The DRI (Dietary Reference Intake) for protein is 0.36 grams of protein per pound (0.8 grams per kg) of body weight.
This amounts to:
56 grams per day for the average sedentary man
46 grams per day for the average sedentary woman
step by Step Instructions
Step 1 – SOAK
Soak the cashews in water for at least 4 hours, overnight is best. The longer you soak them the easier they will blend. To speed up the soaking process, soak the cashews in boiling water.

Step 2 – PRE-FERMENTATION
After the cashews have soaked, drain and pour boiling water over them. Let the cashews sit in the boiled water for a few minutes to kill unwanted bacteria. Drain again and add the cashews to a blender with the filtered water. Blend on high speed, scraping down the sides often, until you get a smooth mixture. No cashew lumps should remain in the mixture. Depending on the power of your blender this may take anywhere from 5 to 15 minutes.
When you have the right consistency, add the penicillium and meso- or thermophilic cultures. Blend again for a few seconds to make sure the cultures are well incorporated into the cashew mixture.
Transfer the mixture to a glass, plastic, porcelain, or ceramic bowl. You’ll want to stay away from metal bowls other than stainless steel because the fermentation acids can react with the metal and leach toxins into your cashew paste. However, it’s uncommon to find non-stainless steel metal mixing bowls.
Loosely cover the bowl with plastic wrap and let sit at room temperature, in a dark place, for 24 hours. During this step, the cashew paste will undergo its first fermentation.


Step 3 – AGING
Optional: after 24 hours, place the bowl in the fridge for a few hours to form the mixture and make it easier to handle.
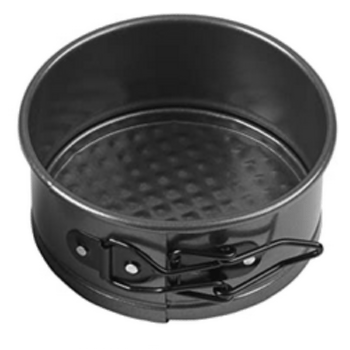
To prepare your cheese molds or springform pans, line them with either baking paper or plastic wrap. This is again to avoid the cheese touching the metal of your mold or springform. Spoon the cashew mix into prepped molds and push it down using a piece of plastic wrap to avoid the mixture from sticking to your hands.
Add the mold or springform to a plate, cutting board, or any other flat surface. Cover the cheese with a bowl or plastic box to keep the moisture in. This will prevent to cheeses from drying out. Place the cheeses in the fridge to age them.


The next day, remove the cheeses from the molds and sprinkle them with salt on both sides to remove excess moisture from the cheeses. At this point they will be still quite creamy, so use a piece of parchment paper or plastic foil to flip them over. After a few days, they will get easier to handle.
Now comes the waiting part. Every day, flip the cheeses. Make sure to thoroughly wash your hands before touching the cheeses or use gloves, parchment paper, or plastic film to flip them.

After about 10 days to 2 weeks, the white rind should start to form. Continue flipping the cheeses every day for another 2 to 4 weeks while the white rind will completely cover the cheese. How long you age the cheese is up to you. The longer you let them go the stronger the cheese flavor will be. We prefer ours after 6 weeks.


If this is your first time, you can try the first of your 3 cheeses after 4 weeks, one after 5 weeks, and one after 6 weeks to determine which you like better. Next time you make them you can let them ferment for the exact amount of time you like.
When they have reached your preferred level of cheesiness, wrap them in parchment paper and store them in the fridge. Eat within 2 to 3 weeks.


FYI AGING OUTSIDE THE FRIDGE, IS IT POSSIBLE?
Yes, it is possible. However, the temperature of the environment should be right. The room temperature cannot be higher than 11-13°C or 52-56°F.
We live in the tropics where the average temperature year-round is around 30°C or 86°F. Aging cheese outside the fridge is just not possible here. Not even if we would have a cool basement.
However, if you live in a colder climate and you have a room where the temperature is constant and not higher than 11-13°C or 52-56°F you can easily age your cheeses outside the fridge. The advantage of doing so is that you will have your cheese ready after about 2 weeks instead of 4 to 6 and you won’t lose so much space in your fridge for all these weeks.

Easy, Printable Recipe Card
Vegan Brie Cheese
Ready for this cashew-based vegan brie cheese with an authentic brie rind and semi-soft texture? Though some patience will be needed as it will take about 6 weeks to make this cheese, it will be totally worth the wait.
Ingredients
- 4 cups raw cashew nuts
- ½ cup filtered water
- ⅛ tsp Mesophilic cheese culture
- ⅛ tsp Penicillium candidum
- 2 tsp Himalayan pink salt or sea salt
Instructions
Step 1 – SOAK
Soak the cashews in water for at least 4 hours, overnight is best.
The longer you soak them the easier they will blend. To speed up the soaking process, soak the cashews in boiling water.
Step 2 – PRE-FERMENTATION
After the cashews have soaked, drain and pour boiling water over them. Let the cashews sit in the boiled water for a few minutes to kill unwanted bacteria.
Drain again and add the cashews to a blender with the filtered water. Blend on high speed, scraping down the sides often, until you get a smooth mixture. No cashew lumps should remain in the mixture. Depending on the power of your blender this may take anywhere from 5 to 15 minutes.
When you have the right consistency, add the penicillium and meso- or thermophilic cultures. Blend again for a few seconds to make sure the cultures are well incorporated into the cashew mixture.
Transfer the mixture to a glass, plastic, porcelain, or ceramic bowl. You’ll want to stay away from metal bowls other than stainless steel because the fermentation acids can react with the metal and leach toxins into your cashew paste. However, it’s uncommon to find non-stainless steel metal mixing bowls.
Loosely cover the bowl with plastic and let sit at room temperature, in a dark place, for 24 hours. During this step, the cashew paste will undergo its first fermentation.
Step 3 – AGING
Optional: after 24 hours, place the bowl in the fridge for a few hours to form the mixture and make it easier to handle.
To prepare your cheese molds or springforms, line them with either baking paper or plastic wrap. This is again to avoid the cheese touching the metal of your mold or springform. Spoon the cashew mix into prepped molds and push it down using a piece of plastic wrap to avoid the mixture from sticking to your hands.
Add the molds or springforms to a plate, cutting board, or any other flat surface. Cover the cheeses with a bowl or plastic box to keep the moisture in. This will prevent to cheeses from drying out. Place the cheeses in the fridge to age them.
The next day, remove the cheeses from the molds and sprinkle them with salt on both sides to remove excess moisture from the cheeses. At this point they will be still quite creamy, so use a piece of parchment paper or plastic foil to flip them over. After a few days, they will get easier to handle.
Now comes the waiting part. Every day, fli[p the cheeses. Make sure to thoroughly wash your hands before touching the cheeses or use gloves, parchment paper, or plastic film to flip them.
After about 10 days to 2 weeks, the white rind should start to form. Continue flipping the cheeses every day for another 2 to 4 weeks while the white rind will completely cover the cheeses. How long you age the cheeses is up to you. The longer you let them go the stronger the cheese flavor will be. We prefer ours after 6 weeks.
If this is your first time, you can try the first of your 3 cheeses after 4 weeks, one after 5 weeks, and one after 6 weeks to determine which you like better. Next time you make them you can let them ferment for the exact amount of time you like.
When they have reached your preferred level of cheesiness, wrap them in parchment paper and store them in the fridge. Eat within 2 to 3 weeks.